We are updating our documentation library to be ready for Sector 10! Find out more in our Sector 10 roadmap or head straight to our collection of Sector 10 - Changes and Updates.
The Page content type is used for pages that are in your menu structure - you can easily move these pages around the menu (even changing their level) and there are plenty of display settings for you to customise how they look.
Not on Sector 10 yet?
See the documentation for editing a page in previous versions of Sector.
To create a new page, you can follow the steps in this documentation:
- Add a new page
- Add title and optional title surrounds
- Add metadata to your page
- Add body content
- Add related content
- Add your page to the menu
- Set display options for your page
- Preview and publish your page
Step 1 - Add a new page
To add a page, use the AdminUI toolbar and navigate to Content > Add content > Page
<your-domain>/admin/structure/node/add/sector_page
This takes you to a node edit form for a page node.
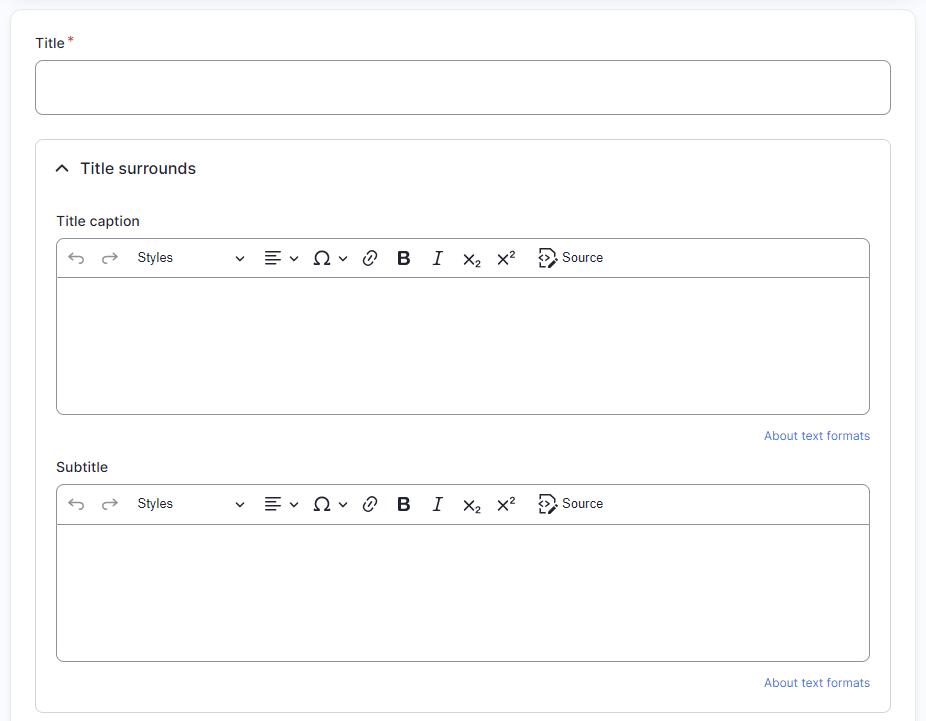
Step 2 - Add title and optional title surrounds
Title is the main title of your page - you will see this in both the backend and frontend.
Use the optional title surrounds to add extra detail to the title that is displayed on the frontend. The title surrounds are displayed in a header area, along with the main title.
Title caption lets you add content above your main title, while Subtitle adds a smaller title under the main title.
Step 3 - Add metadata to your page
The metadata for page just includes the last updated date - when you make changes to your page you may want to update this to indicate to users that the content is up to date.
Step 4 - Add body content
Add your content in the 'Body' section - aka the WYSIWYG editor. You should also review the summary as this may be used in teasers of your content and in menus.
You can learn how to use the editor in our Introduction to the WYSIWYG editor.
Step 5 - Add related content
You can attach related content in the form of internal and external links, as well as uploading files. To learn more about this, see Adding related content to a node.
Step 6 - Add your page to the menu
You can add your page to the menu by toggling on 'Provide a menu link' in the menu settings in the sidebar. Once you've turned on this option you can choose where in the menu your page should sit, along with other settings.
Learn more about managing your website's menu in the Working with menus and menu items documentation.
Step 7 - Set display options for your page
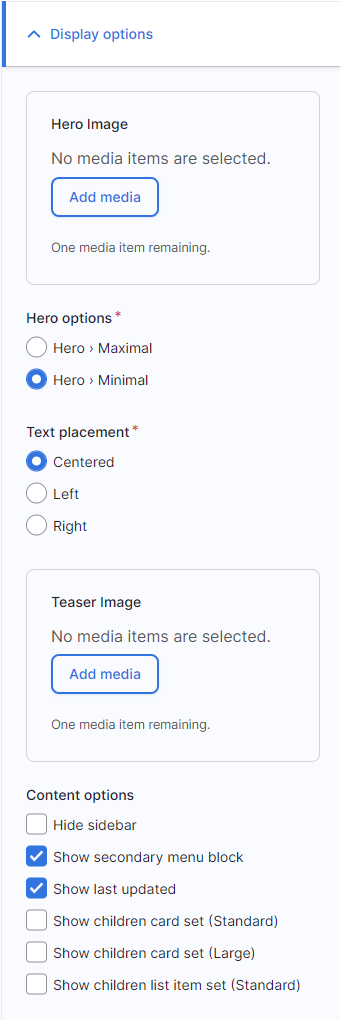
In the sidebar, the display options section provides you with a number of ways to customise the display of your page.
If you add a hero image, it will be displayed at the top of your page - this can be a good way to distinguish level one pages from pages that are lower down your menu structure.
The hero options let you choose how large the display will be, and text placement changes where the title will be displayed on top of the image.
Along with a hero image, you can add a teaser image. This can be good to add, as it can be displayed in teasers on your website as well as when it is shared on social media.
Content options provide you with some more options to customise your page. For example, for a level one page you may want to show its child pages (either as image cards or in a list).
Step 8 - Preview and publish your page
At the bottom of the node edit form you can save and preview your content.
Before you save your page as published, you should preview it to see how it displays - see Previewing your content for your preview options. Publish when you are ready.
Did something go wrong? You can revert your content to a previous version. See Creating and reverting revisions.


