We are updating our documentation library to be ready for Sector 10! Find out more in our Sector 10 roadmap or head straight to our collection of Sector 10 - Changes and Updates.
The media browser is used for selecting and uploading images, videos, and documents to use in your content. It can be accessed via the WYSIWYG editor, and in fields used for selecting files (like teaser images).
This guide explains how to select files using the media browser. The examples given are for selecting an image - however, the steps are similar for other types of media.
In this guide
Open the media browser
In a node edit form, you can access the media browser by:
- Clicking the 'Insert image', 'Insert file', or 'Insert video' buttons in the WYSIWYG toolbar
- Clicking 'Select files' or 'Select images' for fields like Related files and Banner image
Select an existing file from the library
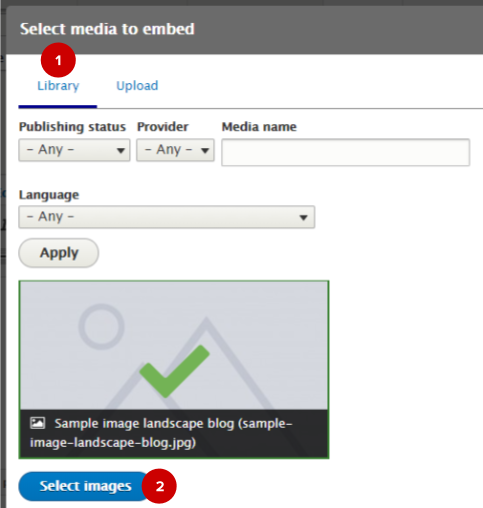
Browse the library ( 1 ) of images that have already been uploaded to your site.
Click the image you want to insert, and then the 'Select images' button ( 2 ).
Upload a new file
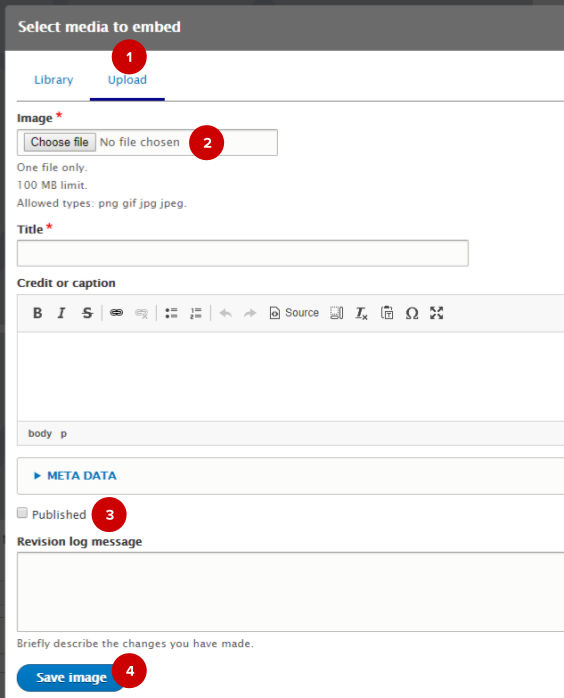
In the upload tab ( 1 ), you can choose the file to upload ( 2 ) and fill in information about the image.
If you want the image to be visible to public users of your site, check the 'Published' box ( 3 ) before you save the image ( 4 ).
Videos need to be uploaded externally
Sector takes advantages of free video hosting platforms and their video optimisation tools. Before you add videos to the media browser, you need to upload your video to an external site (Sector currently supports YouTube and Vimeo) then use the URL of the video to link it to your media management.
Having issues with media files on your site? Check out our troubleshooting guide on Uploading and replacing media files.


