Last updated
Is there something wrong with this page?
We are updating our documentation library to be ready for Sector 10! Find out more in our Sector 10 roadmap or head straight to our collection of Sector 10 - Changes and Updates.
If the Sector Media Gallery add-on has been installed, you are able to add galleries of images and videos to your site. In this guide you can learn how to add and edit media galleries.
Visit the Sector online demo to see a media gallery landing page and sample media galleries
For general guidance on adding and editing content, see: Adding new content to your site and Making changes to existing content on your site.
To add a media gallery, use the AdminUI toolbar and navigate to Content > Add content > Media gallery
<your.domain>/node/add/media_gallery
This takes you to a node edit form for a media gallery node.
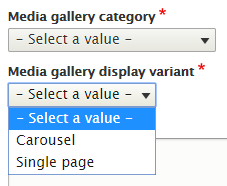
Screenshot - Media gallery category and display variant in the node edit form
Select a media gallery category from the dropdown list. 'Media gallery category' is a taxonomy, so its terms can be changed by content administrators.
You also need to select the media gallery display variant - this decides whether the media is displayed as a pop-up carousel or as single pages.
For media gallery nodes, the body text is displayed in the node teaser (e.g. on the media gallery landing page), while the text you see on the node is the subtitle.
These text fields are edited using the WYSIWYG editor - learn more in Introduction to the WYSIWYG editor.
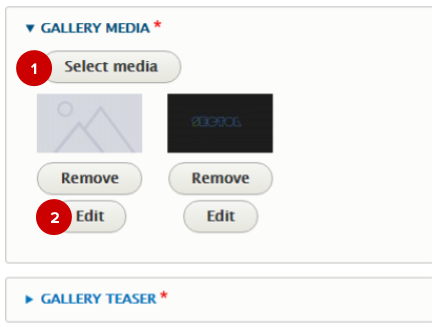
Screenshot - Selecting media for a media gallery node
For media gallery nodes, you need to select the media ( 1 ) which is contained in the gallery - this can be both images and videos.
Click and drag the media to reorder it, and select 'Edit' ( 2 ) to change the description and caption displayed for that piece of media.
You also need to select a 'gallery teaser' for each media gallery. You can learn more about teaser images in Adding banner and teaser images.
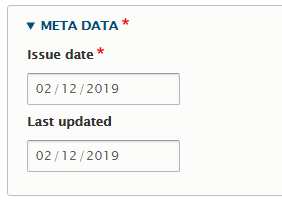
Screenshot - Meta data fields for a media gallery node edit form
Choose the issue date under 'Meta data'. This is displayed in the frontend on the media gallery.
You can also set the date the gallery was 'last updated' - this is displayed at the bottom of the media gallery.
The standard node settings (e.g. authoring information) are at the side of the node edit form. You can learn more about these settings in Changing standard node settings.
At the bottom of the node edit form you can save and preview your content.
Before you save your news as 'published', you should preview it to see how it displays - see Previewing your content. Once you're happy with how it looks, publish the node.